

Epoxy Resin 3d Printing is changing how engineers create detailed prototypes, functional parts, and customized tools. Unlike filament printing, this process cures liquid resin layer by layer with ultraviolet light. A digital model becomes a physical object inside a resin vat. The result can show sharp lettering, smooth walls, and tiny channels that traditional machining may struggle to reproduce.
The market is expanding, but its size requires careful interpretation. The Wohlers Report 2024 valued the global additive manufacturing industry at approximately $20.035 billion in 2023, including hardware, materials, software, and services. SmarTech Analysis has also identified photopolymer materials as an important segment within professional additive manufacturing. These reports support strong commercial momentum, but they do not measure epoxy applications alone. That distinction matters.
Joseph DeSimone, a leading photopolymer 3D printing expert and Carbon co-founder, said, “3D printing is not just about making things; it’s about making things differently.” His observation fits Epoxy Resin 3d Printing well. The technology changes not only the shape of production, but also the timing and economics of development. Designers can test a grip, enclosure, or casting pattern within hours. Yet the process is not effortless. Resin viscosity, exposure time, shrinkage, and post-curing can alter final accuracy. Small errors become visible. Safety procedures also matter, because uncured resin may irritate skin and requires controlled handling.
The promise is real.
However, performance claims should be tested against real operating conditions. This guide examines how epoxy resin printing works, where it performs best, and why material selection remains a practical engineering decision.
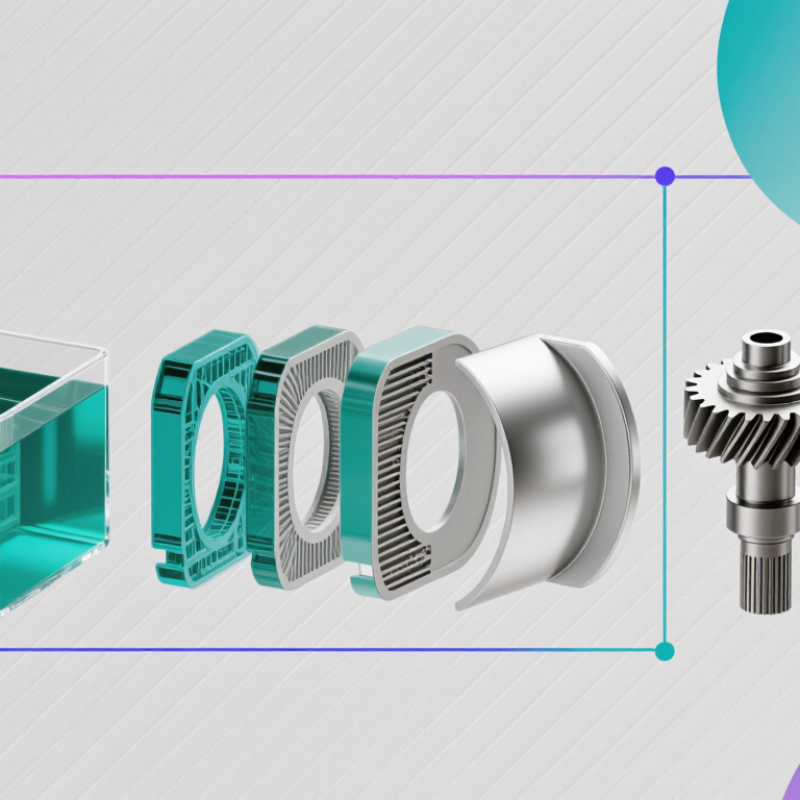
Epoxy resin 3D printing is a liquid photopolymer process that creates solid parts layer by layer. A vat holds resin containing reactive epoxy-like molecules and light-sensitive additives. UV light selectively cures each cross-section, while a build platform moves gradually through the liquid. The result can show sharp corners, fine lettering, and smooth surfaces.
In practice, the term can be confusing. Not every “epoxy resin” used in 3D printing has the same chemistry as two-part casting epoxy. Many systems use engineered photopolymer blends that imitate epoxy’s stiffness, heat resistance, or electrical insulation. After printing, operators may wash the part and apply additional UV curing. That step improves strength, but excessive exposure can make thin features brittle.
According to the Wohlers Report 2024, the global additive manufacturing industry reached approximately $20.035 billion in 2023, growing 13.5% from the previous year. This growth reflects wider industrial adoption, including resin-based prototyping and production tooling. The 2023 Photopolymer Additive Manufacturing report from AM Research also identifies photopolymer technologies as an important segment for detailed parts and short-run manufacturing.
Actual performance still depends on resin formulation, exposure settings, and post-curing. Small errors matter. A slightly overexposed layer can close a tiny channel or soften a sharp edge. Engineers should verify tensile strength, thermal behavior, and long-term aging instead of trusting marketing labels alone.
What Is Epoxy Resin 3D Printing and How Does It Work?
Epoxy resin 3D printing turns a digital model into a physical object through controlled light exposure. The workflow begins with a computer-aided design file. Slicing software divides that model into hundreds of thin layers. Each layer becomes a precise exposure plan.
The printer spreads or holds a measured layer of liquid resin. A light source then hardens selected areas according to the sliced data. The platform moves gradually, often by fractions of a millimeter. Layer by layer, the shape rises from the resin. Support structures hold delicate features, overhangs, and narrow walls during printing. Small design errors can still cause warping. That is why orientation and support placement require careful judgment.
After printing, the part is removed and washed to clear uncured resin. Operators then trim supports and cure the object under controlled light. This final stage improves hardness, stability, and surface performance. In practical work, inspection should include dimensions, sharp edges, trapped resin, and incomplete curing. Resin chemistry differs between materials, so exposure settings cannot be copied blindly. A model may look accurate but remain slightly soft inside. That is an easy detail to miss. Ventilation, protective gloves, and proper waste handling also matter throughout the process. Good results depend on more than the machine; they depend on disciplined preparation and honest inspection.
Epoxy resin 3D printing uses liquid, light-sensitive resin to build detailed parts layer by layer. A digital model is sliced into thin sections, often between 0.03 and 0.10 millimeters. A controlled ultraviolet light source then hardens each layer inside the resin vat. The process works best when exposure time, resin temperature, and layer height remain consistent.
The main material is epoxy-based photopolymer resin. Its viscosity affects how quickly fresh resin flows beneath the model. Pigments, fillers, and additives can change strength, flexibility, color, and curing behavior. Equipment usually includes a resin printer, vat, build platform, slicing software, washing container, and post-curing chamber. Supports are also important. They hold overhangs in place, but poorly positioned supports can leave marks or cause failure.
A reliable workspace needs nitrile gloves, eye protection, ventilation, and sealed containers for uncured resin. After printing, the part is washed, support structures are removed, and additional ultraviolet curing improves its final properties. Do not judge a part by appearance alone. A glossy surface may still feel soft inside. Small calibration tests help determine exposure settings before a larger print begins. Even experienced operators make mistakes when resin temperature changes or the platform is slightly misaligned. That detail is easy to overlook. The equipment reduces many variables, but it does not remove the need for inspection, safe handling, and careful recordkeeping.
In practice, epoxy resin 3D printing usually means vat photopolymerization with an epoxy-containing liquid resin. A light source hardens each thin layer against a build platform. The process begins with a digital model. Designers check wall thickness, drainage, and support points before exporting the file. A poor orientation can leave marks on visible surfaces.
Preparation matters. The resin bottle is gently mixed, not shaken, to reduce bubbles. The vat, platform, and optical window must be clean. Operators then set layer height, exposure time, and lifting speed. These settings depend on resin chemistry, temperature, and printer output. A test piece is useful. It can reveal weak layers before a larger print wastes material.
The printer lowers the platform into the vat and exposes one layer at a time. After each exposure, the platform rises slightly, allowing fresh resin to flow underneath. This cycle continues until the model reaches full height. The unfinished part feels slick and fragile. It needs careful removal, solvent-compatible washing, and drying. Supports are trimmed with sharp cutters. Final curing under controlled light improves hardness and stability. Protective gloves, eye protection, ventilation, and approved waste handling are essential.
Small errors remain common. Excessive exposure may hide fine details, while insufficient exposure causes failed layers. I would not trust one successful print as proof of a perfect setup. Resin temperature, platform alignment, and washing time can change the result. Careful records make the next attempt more reliable.
Epoxy resin 3D printing builds parts by curing liquid resin with controlled light, layer by layer. The printer forms fine details, smooth curves, and narrow openings with impressive accuracy. After printing, the model still feels unfinished. It usually needs washing, support removal, and careful curing under ultraviolet light. A sharp scraper, gloves, and good ventilation make this stage safer and more consistent.
Post-processing affects both appearance and performance. I remove supports before final curing, because cured contact points become harder to sand. Wet sanding can reduce visible marks and leave a cleaner surface. Some parts need primer or paint, while functional pieces may require additional testing. Epoxy resin prints can deliver excellent detail and a polished texture. However, they may become brittle, deform under heat, or weaken after long exposure to sunlight. Results also depend on resin age, exposure settings, and curing time. That variability deserves respect.
Tips: Keep uncured resin away from skin and eyes. Wash parts according to the resin’s instructions, then cure them evenly. Rotate the model during curing. Do not rely on appearance alone; test strength with a small sample first. I have sometimes over-cured thin pieces and made them crack. That mistake is easy to repeat. Printing fewer supports can improve the surface, but it may also cause sagging or failed details. A balanced setup usually matters more than chasing maximum speed.
Epoxy resin prints generally require several post-processing steps after printing. Washing removes uncured resin, UV curing improves hardness and stability, while support removal, sanding, and priming improve the final appearance. Actual times vary with print size, resin formulation, equipment, and the desired surface finish.

